
임계값 검출 - threshold, adaptiveThreshold
- Reference : Python으로 배우는 OpenCV 프로그래밍
- Code : https://github.com/gaussian37/Vision/tree/master/OpenCV/threshold
이미지에서 행과 열의 순서로 img(y, x)에 해당하는 각각의 픽셀이 있다고 가정합시다. 포인트 프로세싱이란 입력 영상의 특정 픽셀 src(y, x)를 변환 함수를 통하여 dst(y, x) 로 만드는 것을 뜻합니다.

이번 글에서는 포인트 프로세싱 중 가장 간단한 threshold에 대하여 알아보도록 하겠습니다.
- 아래 두 함수 즉, 임계값 관련 함수는 영상을 분할하는 가장 간단한 방법입니다.
cv2.threshold()는 주어진 임계값에 따라 threshold image를 출력합니다.cv2.adaptiveThreshold()는 화소 마다 다른 임계값을 적용하는 adaptive threshold 이미지를 계산합니다.
threshold
- ret, dst = cv2.threshold(src, thresh, max_val, type(, dst))
- src : 1-채널의 np.uint8 또는 np.float32 입력 영상
- dst : 1-채널의 np.uint8 또는 np.float32 입력 영상 & src와 같은 크기 영상
- thresh : 임계값
- type : 임계값의 종류
- type에 cv2.THRESH_OTSU를 추가하면 thresh 값에 상관없이 Otsu 알고리즘으로 최적 임계값을 계산함
- cv2.THRESH_BINARY : \(dst(x, y) = \left\{ \begin{array}{c} max\ val\quad if \quad src(x, y) > thresh\\ 0 \end{array} \right.\)
-
cv2.THRESH_BINARY_INV : \(dst(x, y) = \left\{ \begin{array}{c} 0\quad if \quad src(x, y) > thresh\\ max\ val \end{array} \right.\)
-
cv2.THRESH_TRUNC : \(dst(x, y) = \left\{ \begin{array}{c} thresh\quad if \quad src(x, y) > thresh\\ src(x,y) \end{array} \right.\)
-
cv2.THRESH_TOZERO : \(dst(x, y) = \left\{ \begin{array}{c} src(x,y)\quad if \quad src(x, y) > thresh\\ 0 \end{array} \right.\)
- cv2.THRESH_TOZERO_INV : \(dst(x, y) = \left\{ \begin{array}{c} 0\quad if \quad src(x, y) > thresh\\ src(x,y) \end{array} \right.\)
import cv2
import numpy as np
import argparse

# argument parser를 구성해 주고 입력 받은 argument는 parse 합니다.
ap = argparse.ArgumentParser()
# --image : 이미지를 입력 받습니다.
ap.add_argument("-i", "--image", required=True, help="Path to the image")
# --thresh : 임계값을 입력 받습니다. 미 입력시 Otsu를 사용합니다.
ap.add_argument("-th", "--thresh", default=-1, help="Threshold")
args = vars(ap.parse_args())

src = cv2.imread(args["image"], cv2.IMREAD_GRAYSCALE)
thresh = int(args["thresh"])

# 임계값 미입력 시 Otsu 사용
if thresh == -1:
    ret, dst = cv2.threshold(src, thresh, 255, cv2.THRESH_BINARY + cv2.THRESH_OTSU)
    print("Optimal threshold : ", ret)
elif thresh > 0:
    ret, dst = cv2.threshold(src, thresh, 255, cv2.THRESH_BINARY)

cv2.imshow("dst", dst)
cv2.waitKey()
cv2.destroyAllWindows()
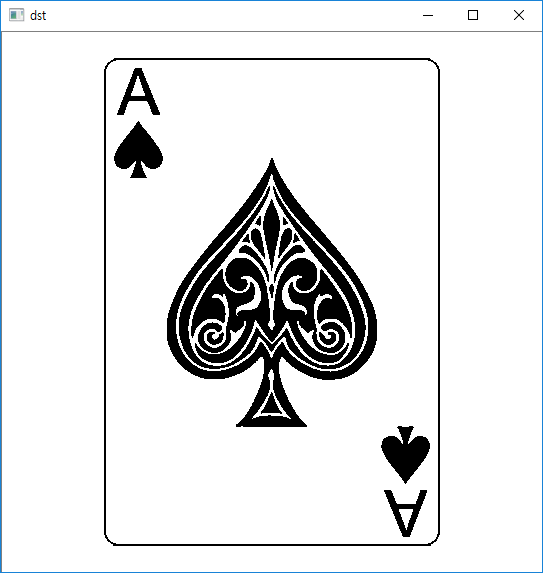
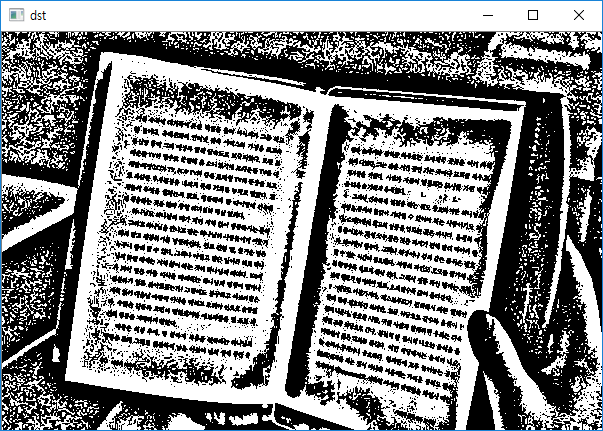
python threshold.py --image="pocker.jpg"
위 명령어를 실행하면 아래와 같은 영상을 얻을 수 있습니다.
adaptiveThreshold
adaptiveThreshold()는 픽셀의 주변값들을 사용하기 때문에 엄밀히 말하면 Point Processing은 아니지만 임계값을 이용한 영상에는 속합니다.- dst = cv2.adaptiveThreshold(src, max_val, adaptiveMethod, thresholdType, blockSize, C(, dst))
- src : 8 비트 1-채널
- blockSize : 주변값들을 이용하기 때문에 주변값의 범위에 해당하는 blockSize x blockSize의 크기값에 해당합니다.
- blockSize의 값은 3, 5, 7,9 같은 홀수를 사용해야 합니다.
- 주변 이웃값들에서 계산한 평균 및 가중평균에서 C값을 뺀값을 임계값으로 계산하고, thresholdType에 따라 출력 이미지를 계산합니다.
- adaptiveMethod : 적응형 임계값의 종류로 주변값들을 이용할 방법
- cv2.ADAPTIVE_THRESH_MEAN_C
block x block 크기의 이웃에서
평균을 계산한 다음, C 뺄셈한 값이 임계값 T(y, x)가 됩니다. - cv2.ADAPTIVE_THRESH_GAUSSIAN_C
block x block 크기의 이웃에서
Gaussian 평균을 계산한 다음, C 뺄셈한 값이 임계값 T(y, x)가 됩니다.
- cv2.ADAPTIVE_THRESH_MEAN_C
block x block 크기의 이웃에서
- thresholdType : 임계값 종류
- cv2.THRESH_BINARY : \(dst(x, y) = \left\{ \begin{array}{c} max\ val\quad if \quad src(x, y) > thresh\\ 0 \end{array} \right.\)
- cv2.THRESH_BINARY_INV : \(dst(x, y) = \left\{ \begin{array}{c} 0\quad if \quad src(x, y) > thresh\\ max\ val \end{array} \right.\)
adaptiveThreshold를 사용하면 조명이 일정하지 않아 어두운 부분에서도 적당하게 검출해 낼 수 있습니다.
import cv2
import numpy as np
import argparse

# argument parser를 구성해 주고 입력 받은 argument는 parse 합니다.
ap = argparse.ArgumentParser()
ap.add_argument("-i", "--image", required=True, help="Path to the image")
ap.add_argument("-t", "--type", required=True, help="mean or gaussian")
ap.add_argument("-b", "--block", required=True, help="Block size")
ap.add_argument("-c", "--c", default=0, help="Constant")
args = vars(ap.parse_args())

src = cv2.imread(args["image"], cv2.IMREAD_GRAYSCALE)
adaptive_type = args["type"]
blockSize = int(args["block"])
c = int(args["c"])

if adaptive_type == "mean":
    dst = cv2.adaptiveThreshold(src, 255, cv2.ADAPTIVE_THRESH_MEAN_C,
                               cv2.THRESH_BINARY, blockSize, c)
    print("adaptiveThreshold Type : Mean")
elif adaptive_type == "gaussian":
    dst = cv2.adaptiveThreshold(src, 255, cv2.ADAPTIVE_THRESH_GAUSSIAN_C,
                               cv2.THRESH_BINARY, blockSize, c)
    print("adaptiveThreshold Type : Gaussian")
else:
    ret, dst = cv2.threshold(src, 0, 255, cv2.THRESH_BINARY + cv2.THRESH_OTSU)
    print("Otsu, Optimal threshold : ", ret)

cv2.imshow("dst", dst)
cv2.waitKey()
cv2.destroyAllWindows()
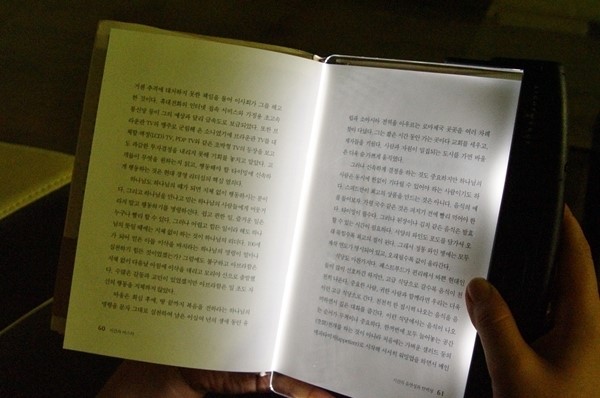
adaptiveThreshold를 사용하는 경우와 그렇지 않은 경우 어떤 차이가 있는지는 이미지 내에 명암차가 많은 경우 쉽게 알 수 있습니다.
- 원본 이미지
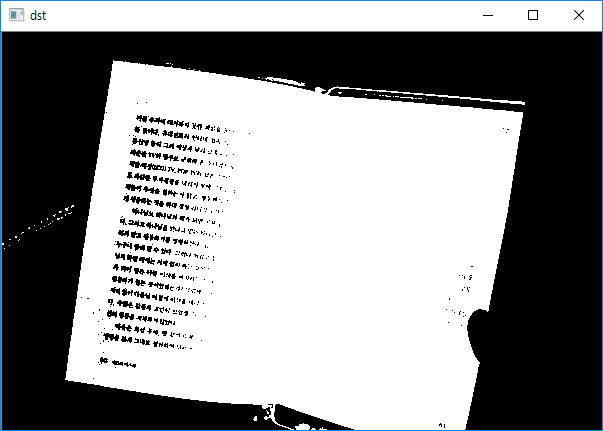
- Otsu 사용한 Threshold
- adaptiveThreshold + Mean
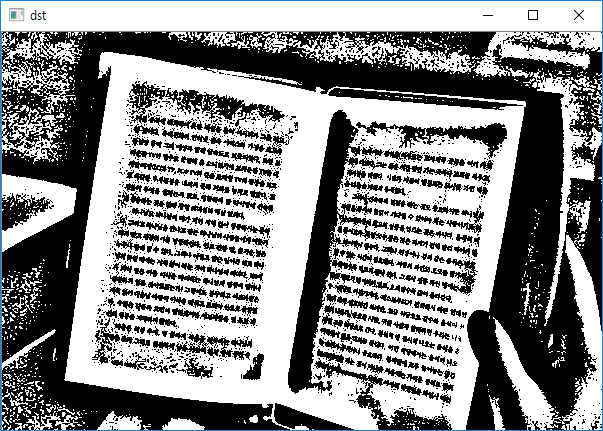
- adaptiveThreshold + Gaussian
이상 opencv를 이용항 threshold 처리방법이었습니다.